• Skip to main content
  • Skip to secondary menu
  • Skip to primary sidebar
  • Skip to footer
sand and snow logo 2023

Sand and Snow

Travel | Food | Beauty | Disney

  • About Sand and Snow
  • Travel
  • Food & Drinks
  • Disney
  • Talk & Tech
  • Beauty
  • Privacy

How to Make a Disney Ear Holder: Easy DIY

October 19, 2020 by Karyn Locke Leave a Comment

1526 shares
  • Share
  • Tweet

If you’re like I am, once you start collecting Minnie ear headbands one is definitely not enough. And, once your collection of Disney ears gets going, you need something adorable to showcase them on. So, out of necessity (and a love of crafting!), I’ve created an easy DIY. Here’s how to make a Disney ear holder with a thorough step-by-step tutorial. 
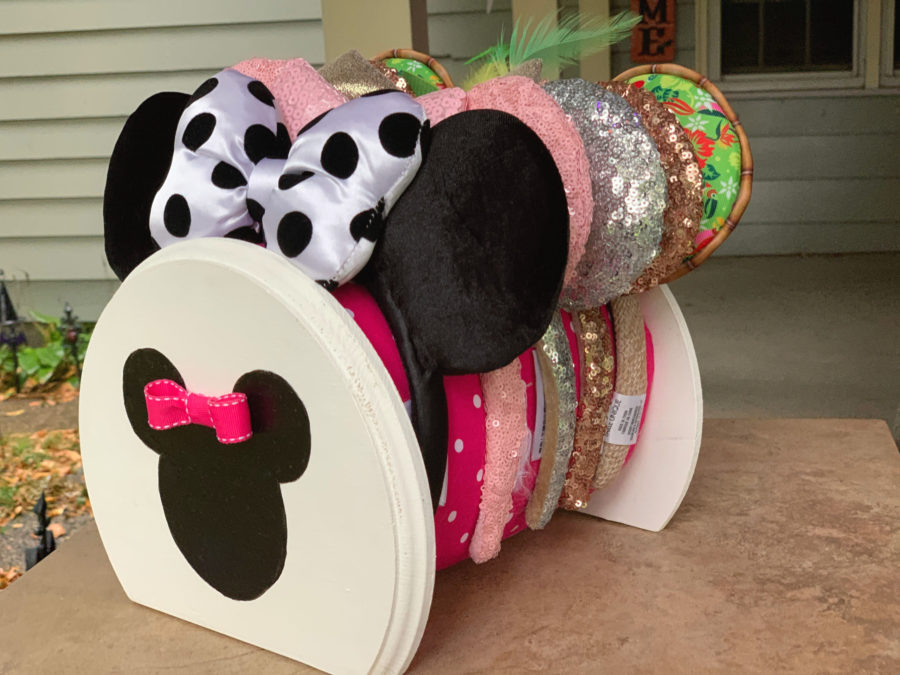
How to make a Disney ear holder - finished and stacked with ears

Minnie ear headbands are one of my favorite accessories when I’m in the Walt Disney Word parks. And, whether I’m making my own Minnie wire ear headbands or buying the latest style, my collection is now upwards of 40+ pairs. Additionally, I love looking at them, so I wanted to create something that would showcase each pair beautifully. With necessity being the mother of invention, I created a Disney ear holder that’s both adorable and practical. Using supplies from craft stores and Walmart, I was able to find everything I needed. Here’s what you’ll need to buy and what you need to do to make one yourself. 

How to Make a Disney Ear Holder – Supplies
Page Contents

Toggle
  • How to Make a Disney Ear Holder – Supplies
  • DIY Disney Ear Holder – Step 1
  • DIY Disney Ear Holder – Step 2
  • DIY Disney Ear Holder – Step 3
  • DIY Disney Ear Holder – Step 4
  • DIY Disney Ear Holder – Step 5
  • DIY Disney Ear Holder – Step 6
  • DIY Disney Ear Holder – Step 7
  • DIY Mickey Ears Holder – Step 8
  • DIY Minnie Ears Holder – Step 9

Disney Ear Headband Holder DIY Minnie ear headband holder supplies

Here’s the list of supplies you’ll need to make a Disney ear holder:

  • 2 8-inch wooden circular plaques – I bought mine at JoAnn. Look for 50% off coupons. 
  • A metal/carboard coffee can. If you can find a circular plastic coffee can, that will work as well. I used the largest size possible as I have a LOT of ears!
  • White acrylic paint
  • Black acrylic paint
  • Fabric of your choice
  • Fluffy blanket material – enough to double over the coffee can. I found the kind to make homemade throw blankets on sale at JoAnn. 
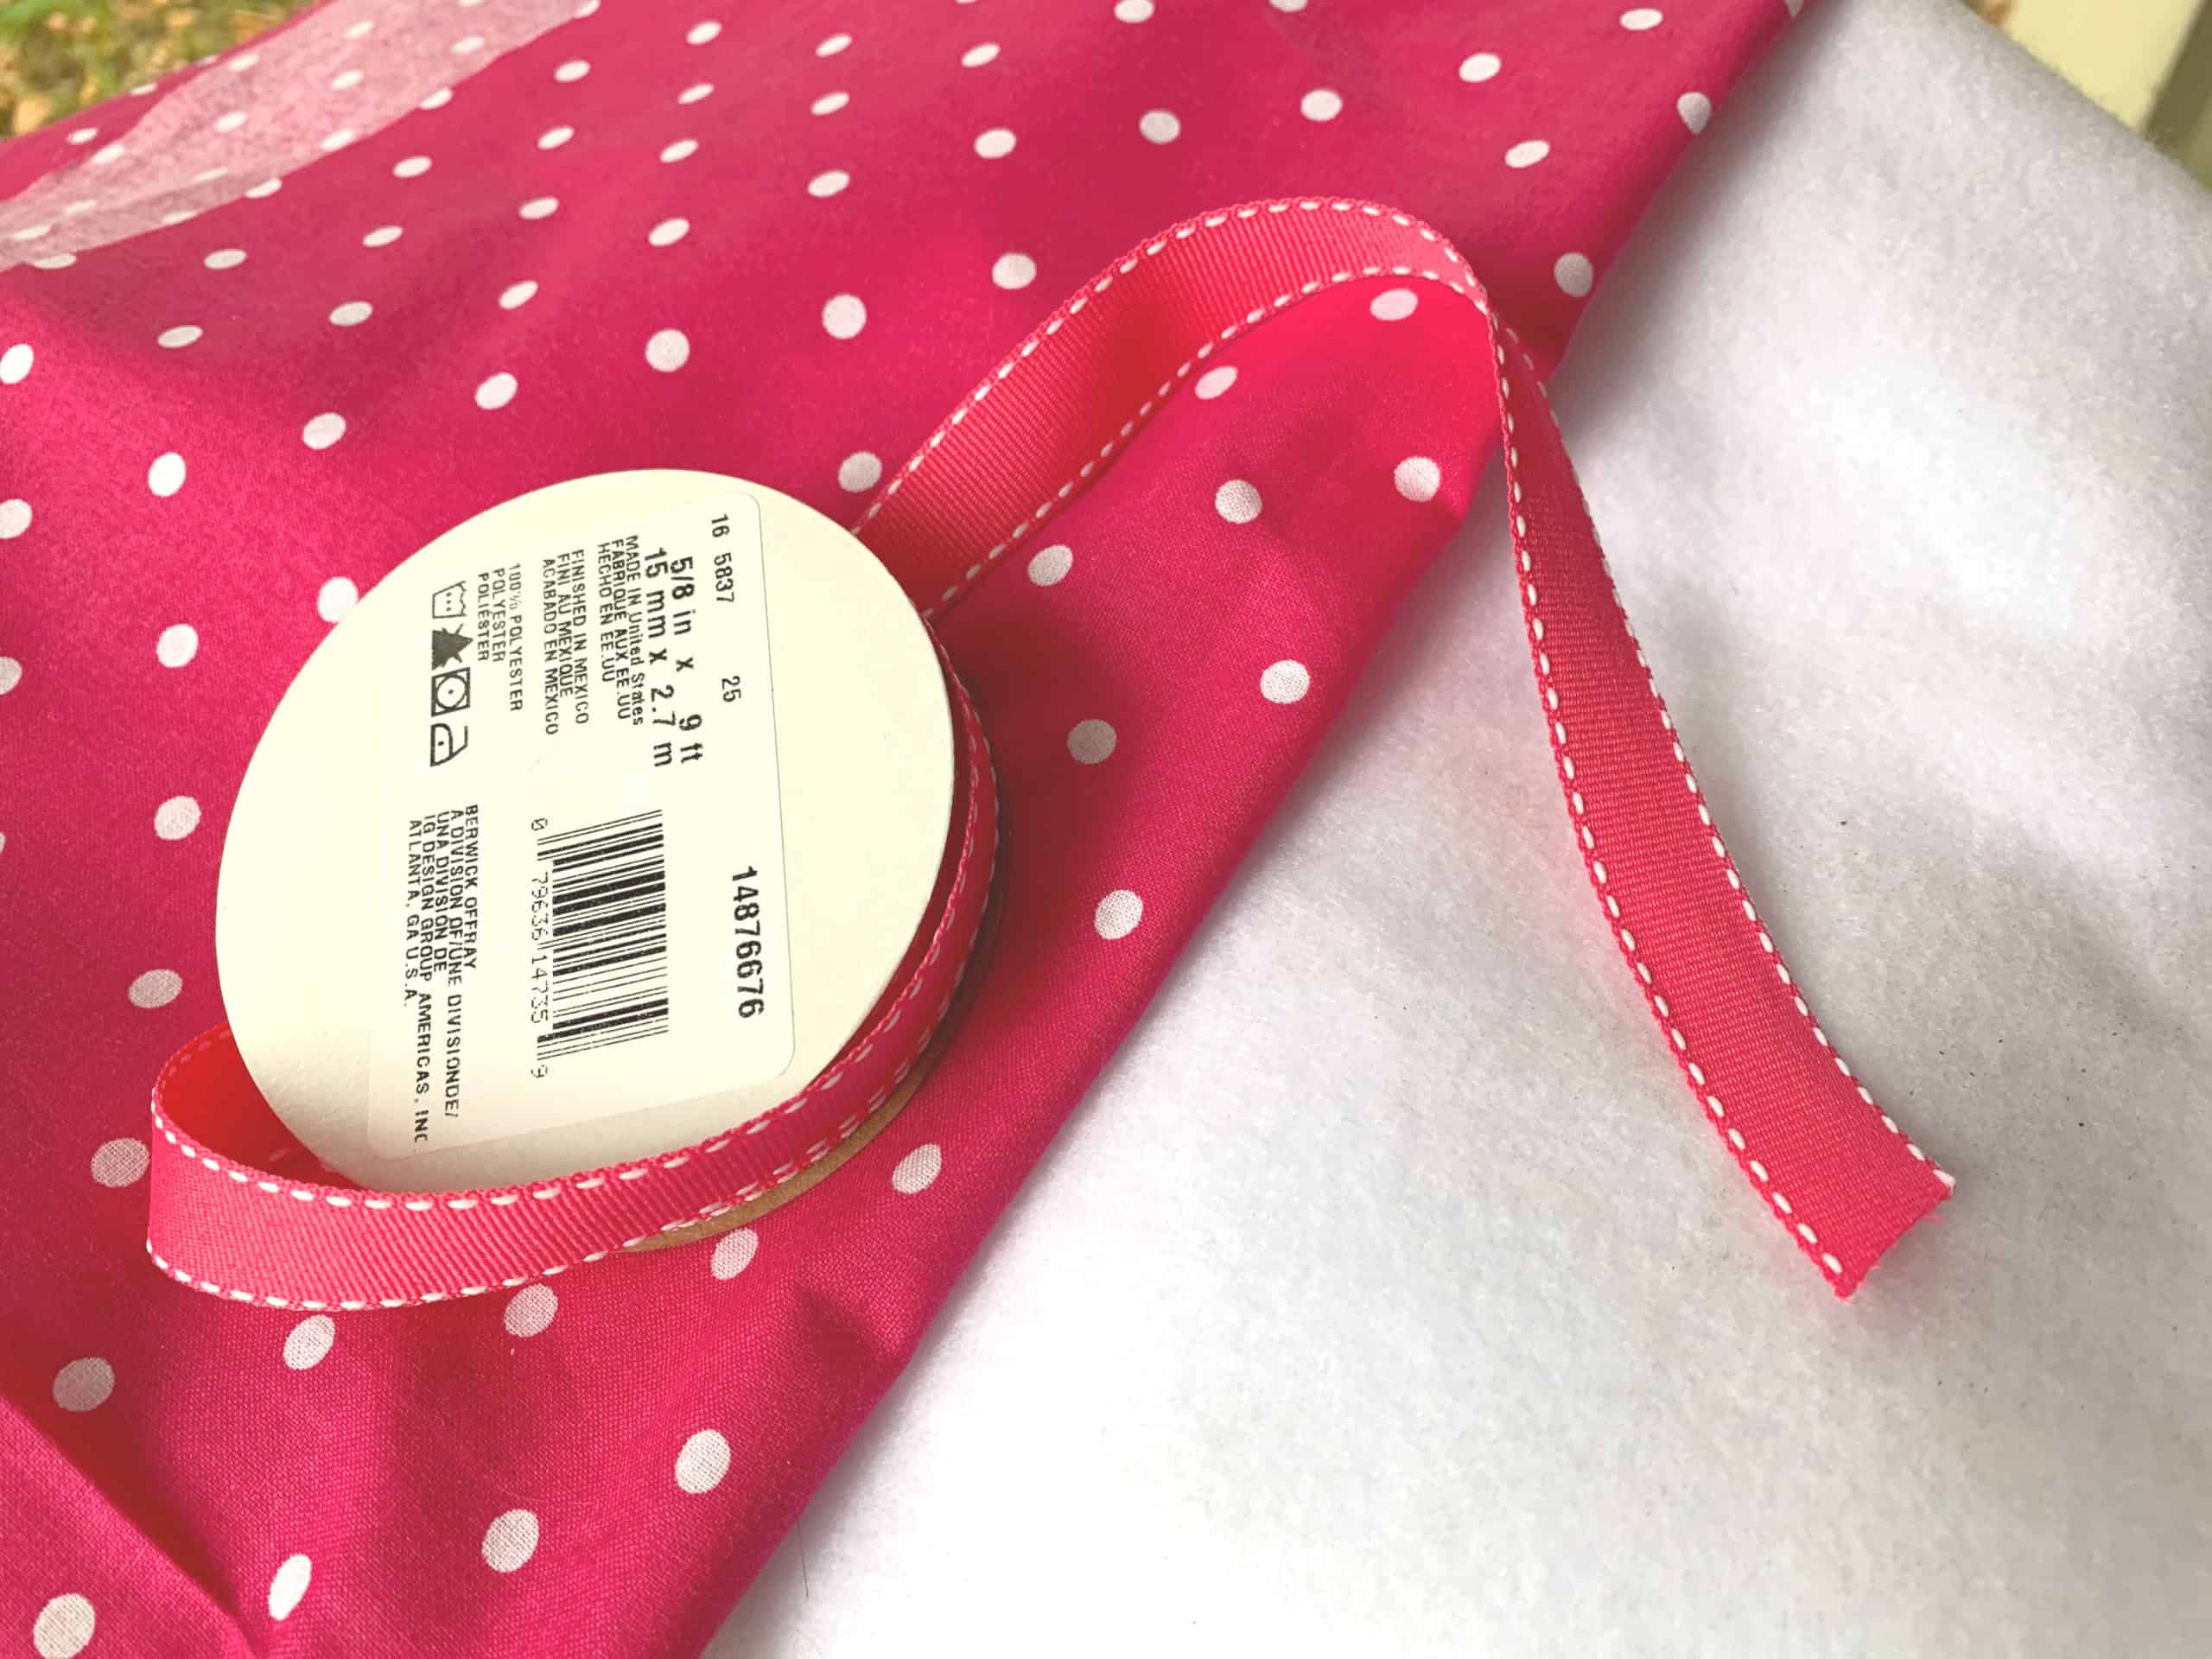
  • Matching ribbon

Tools:

  • Hot glue gun
  • Glue sticks
  • E6000 craft glue
  • Paint brush
  • Small saw
  • Sanding paper
  • Safety glasses
  • Thick paper
  • Pencil

DIY Disney Ear Holder – Step 1

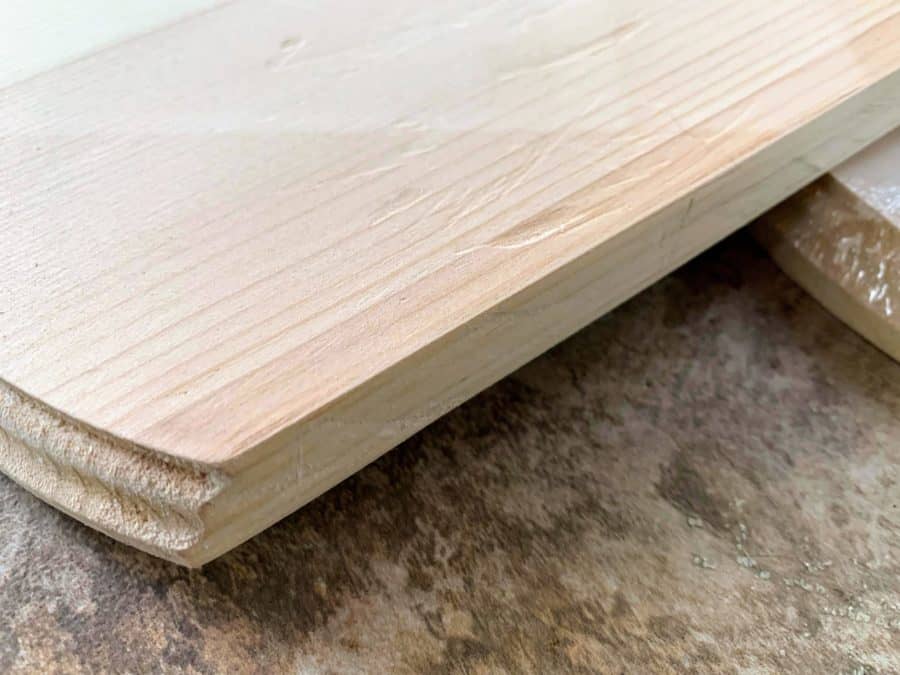
Minnie ear headband holder cut wood
Cut a flat surface on wooden circles and sand.

For this step you’ll need your wooden plaques and the coffee can. Make a straight line 1 1/2 inches across with a pencil on both wooden circles and cut with your saw. I used a small hacksaw and it worked well. Please be cautious and use safety glasses.

Tip: My wooden circles are made out of pine. As pine’s a soft wood, it tends to make small dents if your cutting surface is bumpy, so make sure it’s clean before you cut. 

Once cut, take the sanding paper and sand the rough edges smooth. 

DIY Disney Ear Holder – Step 2
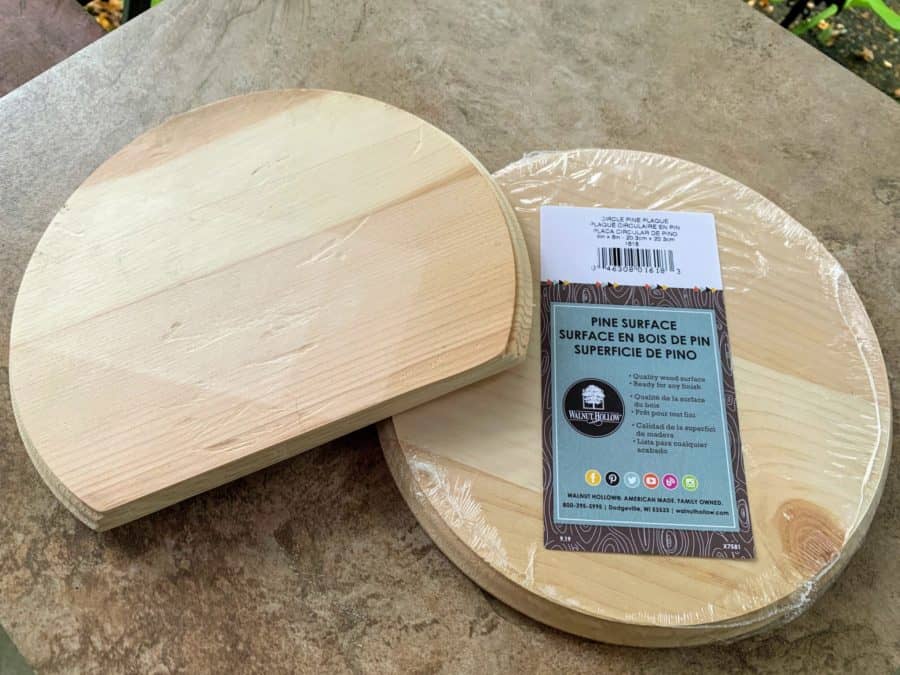
Disney ear headband holder precut wood circles
Paint both circles with white acrylic paint.

Paint both circles with white acrylic paint. I wanted a really smooth surface, so I gave mine 3 coats to make it super opaque. Allow to dry completely between coats. 

DIY Disney Ear Holder – Step 3
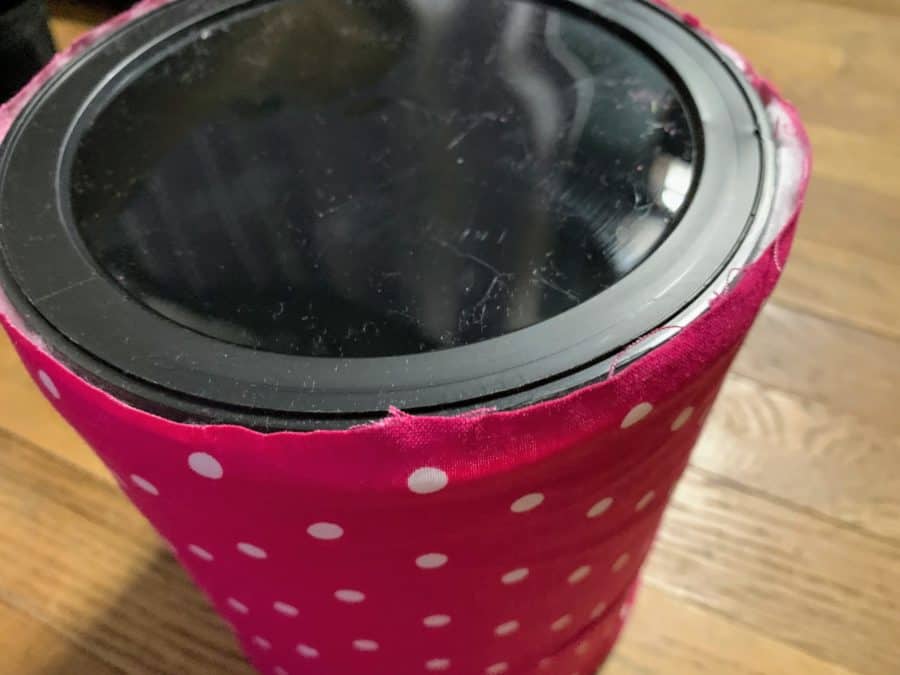
Disney ear headband tutorial DIY
Coffee can, fluffy blanket material, and outer material. Leave the lid on.

While the wooden plaques are drying, work on covering your coffee can. Taking the fluffy material, fold over and measure enough to completely go around the can. Remember, you want two layers of the fluffy material. 

Keep the lid on. 

Then, using your glue gun, glue each layer down separately. I glued both layers down on the same spot and and made that the bottom of the holder. 

Next, do the same thing with the outer material but use only one layer of fabric. Glue down so the seam meets the seam of the fluffy fabric. You want the material tight but no so much that it has permanent creases. 

DIY Disney Ear Holder – Step 4
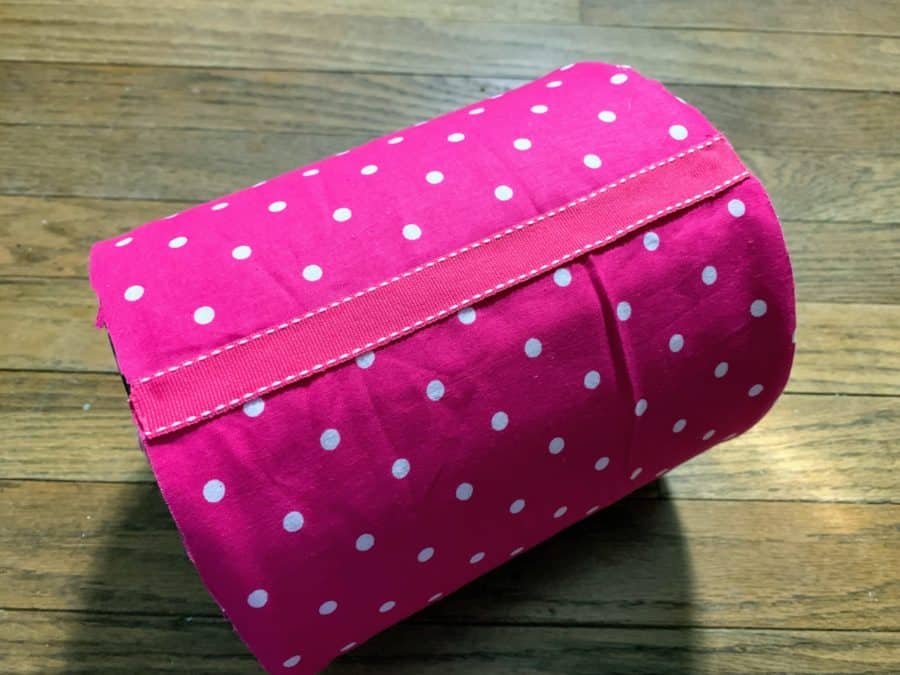
DIY Disney headband holder
Glue coordinating ribbon onto fabric seam.

Cut your coordinating ribbon to the length of your coffee can and hot glue over the fabric seam. While, technically, you don’t have to, I like a pretty, finished edge. 

DIY Disney Ear Holder – Step 5
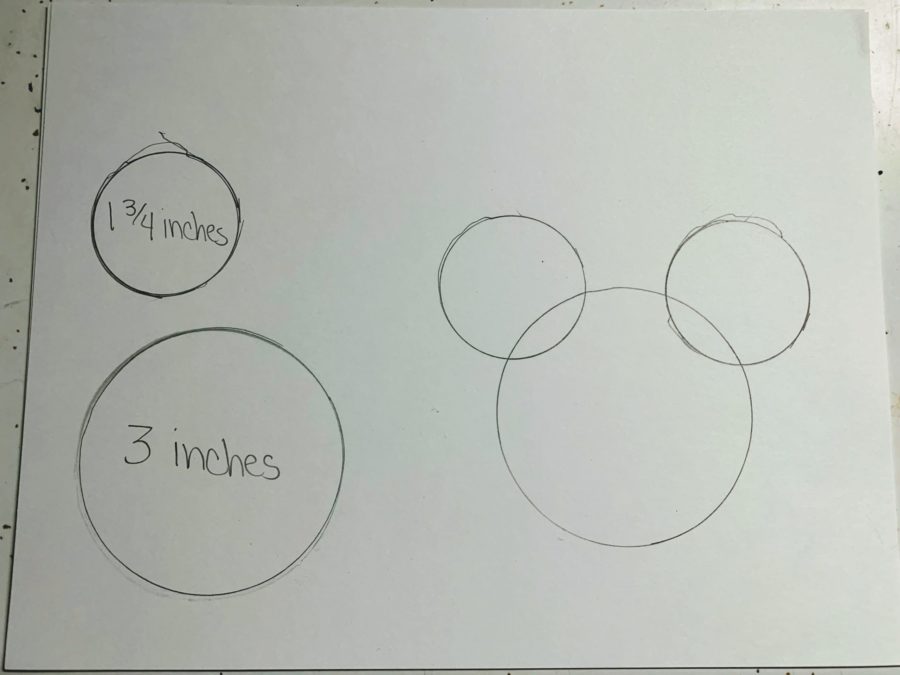
Minie ear headband holder
Make a Mickey head template using circles.

Using two circles, one smaller than the other, draw a Mickey head on your paper and cut out. I looked for circles around the house and use them as templates. My circles were 3 inches and 1 3/4 inches in diameter. Recess the smaller circles a little when you’re tracing. 

If you’re good at freehand drawing, you could easily draw one as well. 

DIY Disney Ear Holder – Step 6
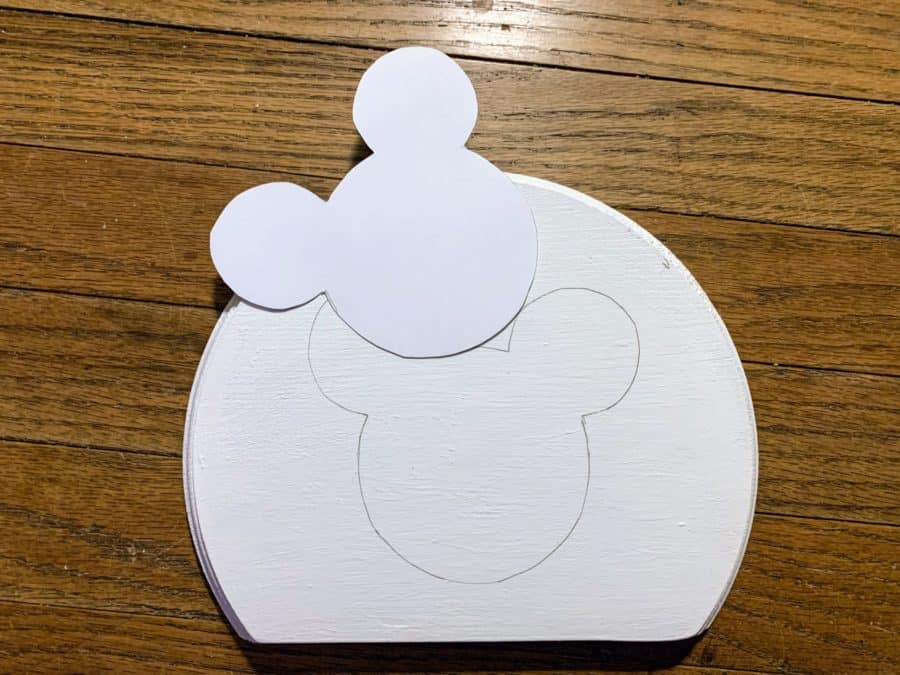
Mickey head template
Trace your Mickey head template onto the wooden plaque.

Using a pencil, trace round the outside of the Mickey head on your wooden plaque. You can do both sides of the holder or one. For me, I did just the front side. 

DIY Disney Ear Holder – Step 7
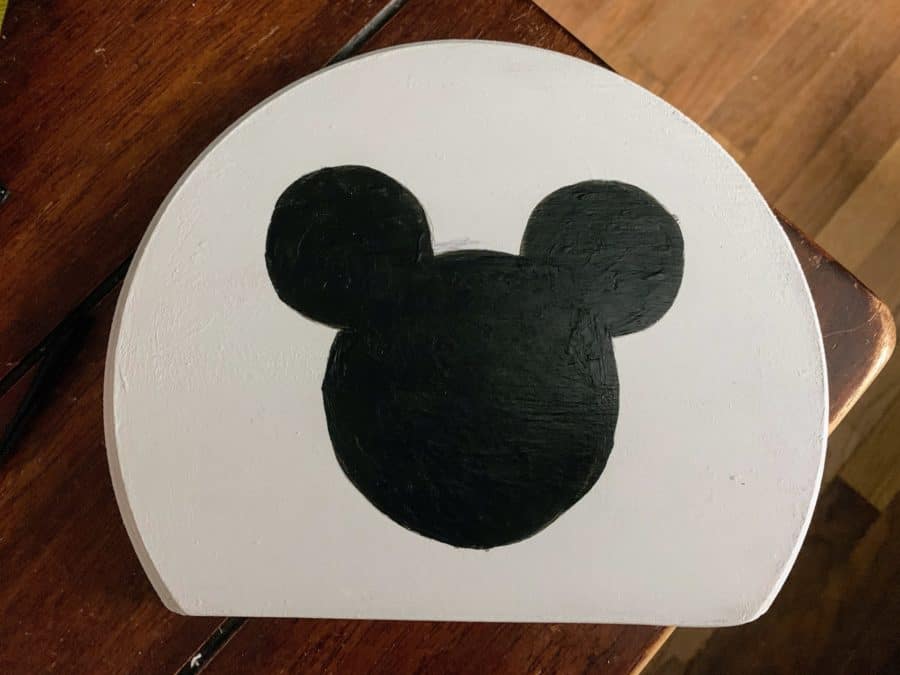
How to make a Disney ear holder -painting on the Mickey head
First coat of black paint.

Paint the inside of your Mickey with black acrylic paint. If you have a Cricut, you could always print out a sticker of a Mickey head and use it, too. Painting black paint onto a white surface requires at least 4 coats, so this is the step where patience is key. Each coat will smooth out the bottom so, again, take your time. 

DIY Mickey Ears Holder – Step 8
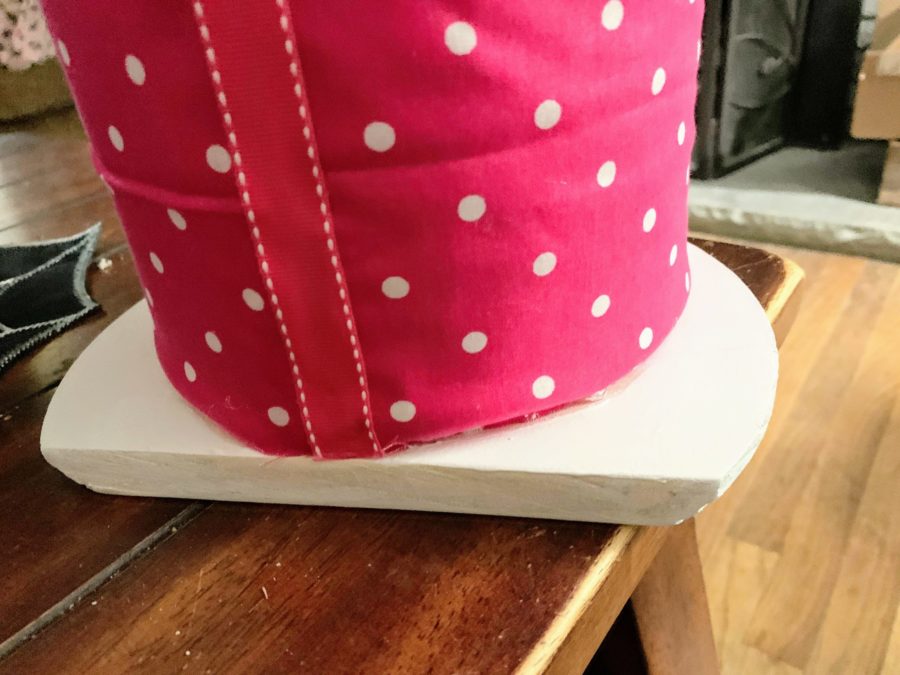
minnie ear headband holder gluing the ends
Glue each end and let dry completely.

Using both E6000 glue and hot glue around the edge of your can and fabric, connect both wooden plaques to your covered coffee can. I find using both glues really helps to keep the plaques secured. Also, make sure the first plaque is completely dried before gluing the other side. 

Allow to thoroughly dry before standing upright. 

Tip: Make sure the bottom (flat) edges of the wooden circles are facing down, as well as the ribbon seam itself. 

DIY Minnie Ears Holder – Step 9

How to make a Disney ear holder - finished product

Using either your ribbon or a small piece of material, make a bow and attach using hot glue. Start with the loops and hot glue the ends together. Next, take a smaller piece and wrap around the center, gluing in the back. 

And that’s it! You have one adorable Disney holder for your Minnie ears. Mine easily holds five pairs of ears, but if you want to showcase more, connect additional coffee cans together. My tip is to use E6000 and hot glue together and then duct tape around the seams for sturdiness before you cover with fabric. 

Filed Under: Disney, DIY Tagged With: Disney ears storage, displaying Minnie ears, how to make a Disney Ear Holder, how to store Minnie Mouse ears, mickey ears headband holder, Minnie ear holder DIY

Reader Interactions

Leave a Reply Cancel reply

Your email address will not be published. Required fields are marked *

Primary Sidebar

Thanks for popping by the site! Sand and Snow is dedicated to provided travel tips, fun recipes, reviews, and plenty of theme park planning tools. Email klocke@sandandorsnow.com with questions and comments.

Connect with Us

  • Amazon
  • Email
  • Facebook
  • Instagram
  • LinkedIn
  • Pinterest
  • TikTok
  • Twitter
  • YouTube

Disney Park Planning

things you can only do on a disney cruise - Disney Treasure Arrival

Magical Experiences You Can Only Do on a Disney Cruise

February 5, 2025 By Karyn Locke

Request a Disney World Room or Resort Area - Exterior of Disney's Polynesian Village Resort

How to Request a Disney World Room or Resort Area: Easy Tips and Tricks to Get the Ideal View

November 25, 2024 By Karyn Locke

Things We Wish Disney World Never Got Rid of - Wishes fireworks

12 Things We Wish Disney World Never Got Rid of — and One We’re Happy They Did

October 15, 2024 By Karyn Locke

Looking for places to get alcohol in Walt Disney World - Oga's Cantina

A Guide to Liquor in the Most Magical Place on Earth: Places to Get Alcohol in Walt Disney World

October 6, 2024 By Karyn Locke

Footer

About Our Affiliate Links

Sand and Snow uses affiliate links in its posts and articles and is a member of the Amazon Services LLC Program that provides earned advertising fees at no additional cost to the reader.

Recent

  • How To Avoid Holiday On The Road Disappointment
  • Moving Home? How to Speed Up the Buying and Selling Process
  • How to Add a Touch of Floral Comfort to Your Family Getaway: 5 Simple Ways
  • How to Plan the Perfect RV Adventure
  • 4 Delightful Destinations For A Kid-Friendly Holiday

Search

Copyright © 2025 · Magazine Pro on Genesis Framework · WordPress · Log in

We Value your Privacy
We use cookies on our website to give you the most relevant experience by remembering your preferences and repeat visits. By clicking “Accept All”, you consent to the use of ALL the cookies. However, you may visit "Cookie Settings" to provide a controlled consent.
Cookie SettingsAccept All
Manage consent

Privacy Overview

This website uses cookies to improve your experience while you navigate through the website. Out of these, the cookies that are categorized as necessary are stored on your browser as they are essential for the working of basic functionalities of the website. We also use third-party cookies that help us analyze and understand how you use this website. These cookies will be stored in your browser only with your consent. You also have the option to opt-out of these cookies. But opting out of some of these cookies may affect your browsing experience.
Necessary
Always Enabled
Necessary cookies are absolutely essential for the website to function properly. These cookies ensure basic functionalities and security features of the website, anonymously.
CookieDurationDescription
cookielawinfo-checkbox-analytics11 monthsThis cookie is set by GDPR Cookie Consent plugin. The cookie is used to store the user consent for the cookies in the category "Analytics".
cookielawinfo-checkbox-functional11 monthsThe cookie is set by GDPR cookie consent to record the user consent for the cookies in the category "Functional".
cookielawinfo-checkbox-necessary11 monthsThis cookie is set by GDPR Cookie Consent plugin. The cookies is used to store the user consent for the cookies in the category "Necessary".
cookielawinfo-checkbox-others11 monthsThis cookie is set by GDPR Cookie Consent plugin. The cookie is used to store the user consent for the cookies in the category "Other.
cookielawinfo-checkbox-performance11 monthsThis cookie is set by GDPR Cookie Consent plugin. The cookie is used to store the user consent for the cookies in the category "Performance".
viewed_cookie_policy11 monthsThe cookie is set by the GDPR Cookie Consent plugin and is used to store whether or not user has consented to the use of cookies. It does not store any personal data.
Functional
Functional cookies help to perform certain functionalities like sharing the content of the website on social media platforms, collect feedbacks, and other third-party features.
Performance
Performance cookies are used to understand and analyze the key performance indexes of the website which helps in delivering a better user experience for the visitors.
Analytics
Analytical cookies are used to understand how visitors interact with the website. These cookies help provide information on metrics the number of visitors, bounce rate, traffic source, etc.
Advertisement
Advertisement cookies are used to provide visitors with relevant ads and marketing campaigns. These cookies track visitors across websites and collect information to provide customized ads.
Others
Other uncategorized cookies are those that are being analyzed and have not been classified into a category as yet.
SAVE & ACCEPT